One hates to be part of a statistic, but it seems like I’m one of the 94 per cent of people who had no idea that a silent killer was lurking in my home. It’s radon, which takes the lives of eight Canadians each day. Imagine my surprise when I learned that the Edmonton home I’ve lived in for more than two decades measured for radon at levels almost double the current Canadian guideline.
Radon, which naturally occurs in rock and soil, is the leading cause of lung cancer in non-smokers and the second leading cause of cancer next to smoking in Canada.
I vaguely remember hearing of radon gas in the past but more or less dismissed it, thinking it had more to do with mining and industrial workplaces and more related to smoking. My situation came to light when I had an opportunity to test a new gadget called Airthings Wave. It looks like your typical smoke detector, except it measures radon.
While levels in my home seemed to change daily, going up and down like a yoyo, overall they were a little too high for comfort.
Measurements that averaged over 200 Bq/m3 (Canada’s guidelines) over the 90 day suggested test period motivated me to relocate my basement home office, where the test unit was located, to upstairs. Not long after, alarm bells sounded when I read about a non-smoking couple diagnosed with radon-induced lung cancer.
I started to worry after I bought a second unit to again test radon levels and found I was getting red light readings in my upstairs bedroom.
I realized I had to do something.
After extensive research and reading reviews, I contacted Andrew Arshinoff from RadonCare. He listened to my concerns, answered all my questions but also asked a lot of questions. To calm me down, he reassured me that the situation was fixable, wouldn’t cost an arm and a leg and would likely take about a day.
But, Andrew said, “before we talk mitigation, we need to make sure that the tests give an accurate representation of the radon in the house to see what next step is necessary,” Andrew told me. “There’s no point in fixing a problem that never existed.”
As it turned out, my two sets of tests over an extended period were sufficient to warrant my home to be mitigated, he added.
He said that, for the most part, 95 per cent of the time, a sub-slab depressurization system – which consists of one or more pipes attached to a fan or blower that sucks the contaminated air from under the house through holes in the concrete floor – is used to mitigate a house.
“A lot of factors come into play into which method will be used and what the system would look like,” he said. “Things like size, house footprint, where the house is located, the year it was built, whether there is a basement and the composition of the ground the house sits on.” Composition includes sand, clay, gravel, sometimes even water, or some combination of them.
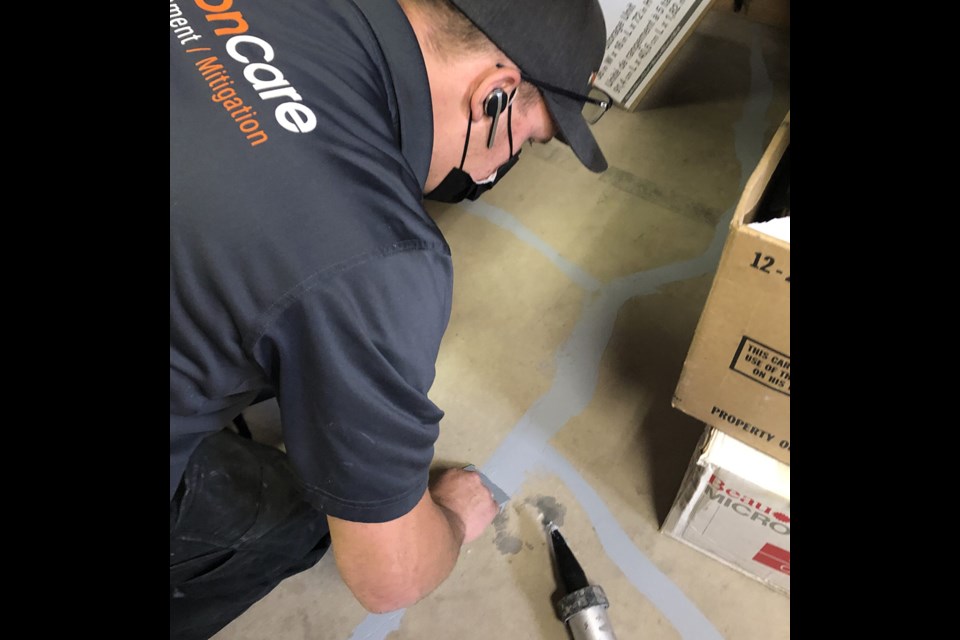
I started the mitigation by clearing the perimeter of the basement wherever there were exposed walls to the outside so that RadonCare could check for air leaks and uncover any cracks on the basement slab, which they would eventually fill. The better the seal, Andrew said, the better the suction to remove the radon.
Other considerations, Andrew added, are system placement, that is, proximity to existing equipment, where to place the vents to the outside of the house while still considering esthetics.
The science starts the moment the first hole is drilled to see how well the air moves beneath the concrete.
To determine the optimal suction point(s), RadonCare drilled a couple of tiny temporary test holes (about the thickness of a pen) around the basement corners. They then used a manometer with little tubes to measure the pressure differential between the basement and the concrete slab to determine how the air will flow.
Andrew determined that to properly treat the entire area of my L-shaped 125 square metre home would require two suction points on the floor and one exit point. Each hole would be five inches wide and would require four-inch PVC pipe. Using these measurements and taking into account the amount of pipe length needed and the resistance of the piping itself, he then selected the right fan that would apply just the right amount of pressure at the suction points so the system would be efficient, effective and be as quiet as possible as it will be running 24/7.
The whole process, including the assessment, installation of the equipment, cleanup, final testing, and signing off, took about eight hours.
My basement had originally tested at an average of over 300Bq/m3. A spot test on the day of installation was 497Bq/m3. Within 48 hours after installation, that number had dropped to 40Bq/m3. So far, my 53-day average is 45Bq/m3 with the highest being 68Bq/m3.
The cost amounted to what you would pay for a furnace or an air conditioner to be installed in your home. Operating costs are what it takes to run the fan, which Andrew guesstimates at about $60 per year.
Since the mitigation, I have to admit I am sleeping much better.
Troy Media columnist Greg Gazin, also known as the Gadget Guy and Gadget Greg, is a syndicated veteran tech columnist, communication, leadership and technology speaker, facilitator, blogger, podcaster and author. Reach him @gadgetgreg or at GadgetGuy.ca.
© Troy Media


